Whether it’s your first time towing a trailer, or you are a seasoned pro, there is a lot of information to help improve your towing experience. In this blog, we cover all the ways to get your vehicle ready for towing so your maiden voyage goes off without a hitch (pun intended).
Vehicle Towing Capacity
The first step to towing easily and safely is to ensure your vehicle is capable. We encourage you to check your vehicle’s owner’s manual for towing and tongue weight capacity. If you can’t track down the physical copy of your owner’s manual, you can go to your vehicle’s manufacturer’s website. You'll find an Owner’s Resources section where you can plug in your vehicle’s year, make, and model or your vehicle’s VIN. (Pro-Tip: your towing capacity is often listed on the door jamb of the driver’s door as well!)
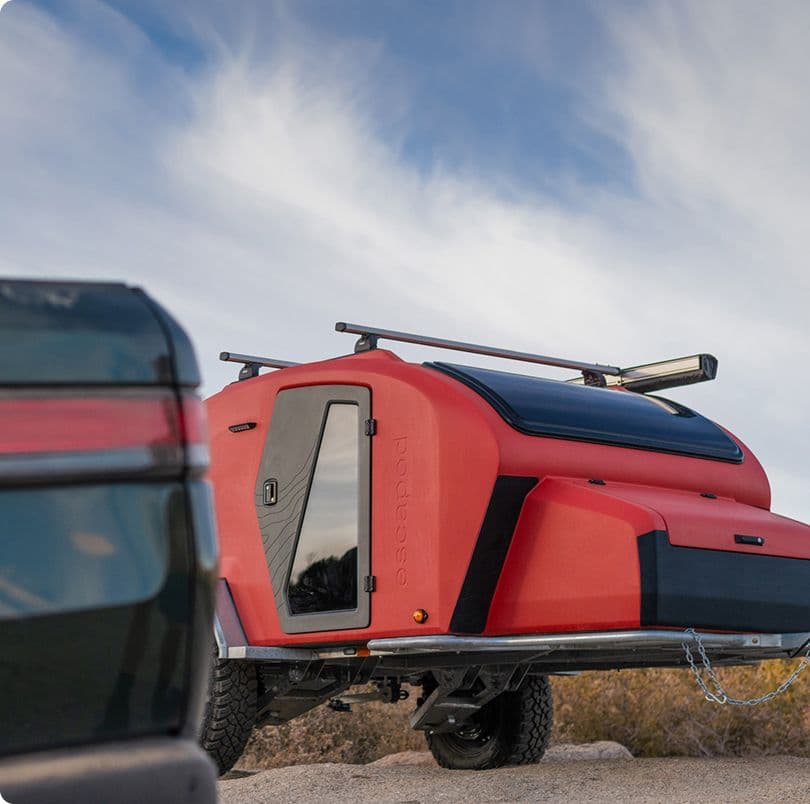
For your reference, the base model of a TOPO2 Voyager is 2,010 lbs with a tongue weight of 250 lbs. The base model of a TOPO2 Nomad is 1,650 lbs with a tongue wight of 250 lbs. Please note that as you opt for additional add-ons, the weight of your trailer will increase. This will increase the overall weight and tongue weight of your Escapod.
(If you are an Original TOPO owner, a base Original TOPO weighs 1780 lbs with a tongue weight of 250 lbs.)
Vehicle Towing Package
A tow package should be a complete set of everything you will need to tow your trailer reliably and safely. In most cases, a factory-installed towing package will include a hitch receiver, trailer towing wiring harness, and a strong frame for mounting the hitch.

Ensure that you have a 2” hitch receiver installed on your tow vehicle. A hitch receiver is a square steel tube that a ball hitch is inserted into and then secured with a hitch pin. Please note, your hitch receiver should be a Class III receiver, which means that the hitch receiver is rated to tow up to 6000 lbs of gross trailer weight with a maximum trailer tongue weight of 600 lbs.
Ensure that you have a 2” hitch receiver installed on your tow vehicle. A hitch receiver is a square steel tube that a ball hitch is inserted into and then secured with a hitch pin. Please note, your hitch receiver should be a Class III receiver, which means that the hitch receiver is rated to tow up to 6000 lbs of gross trailer weight with a maximum trailer tongue weight of 600 lbs.
Hitch receivers are vehicle-specific, so it’s important to check and ensure that you purchase a hitch to fit your vehicle. Any typical garage or RV dealership will be able to install a hitch receiver for you. (Check here for a list of Pep Boys Auto Service Shops, or here for a list of U-Haul locations. Both are national chains and capable of installing a hitch receiver for you!) Or, if you’re more the do-it-yourself type, you can order a hitch receiver yourself to install. We suggest using a company like eTrailer.com. They will recommend custom-fit accessories based on your vehicle’s year, make, and model. Visit their website here to get started!
Electrical Connection
Now that you can physically attach your trailer to your vehicle, you need to make sure that it’s road-safe electrically. You’ll need to verify your tow vehicle has a proper wiring harness for trailer lights. A wiring harness is an organized set of wires, terminals, and connectors that relay information and electric power from the tow vehicle to the trailer.

A 7-pin or a 7-round connector is the type of harness that is standard on the TOPO2. The additional pins on that harness allow for the tow vehicle to talk to the trailer and engage the brakes, as well as turn on the brake lights, turn signals, and running lights.
If your vehicle does not have the proper wiring harness, there are installation kits readily available. You can also take your vehicle into any garage or RV dealership to have it installed.
Brake Controller
We often recommend the electric brake add-on for your trailer. It takes a lot of power to bring a vehicle and trailer to a stop. It is generally safer for your pod to have brakes installed as it provides more accurate and controlled braking. Adding electric brakes also protects against any undue wear and tear on your tow vehicle.
If you opt for electric brakes on your trailer, you’ll need a brake controller for your tow vehicle. A brake controller is an electronic device that regulates the trailer brakes; it works as an accelerometer by measuring the vehicle’s acceleration and sensing any changes in momentum. When you press the brake pedal, the brake controller applies power to the trailer brakes in proportion to the tow vehicle's momentum.

We generally recommend the Tekonsha P3 brake controller, which is readily available and easy to operate. Similar to a hitch receiver, or a wiring harness, any garage or RV dealership can properly install a brake controller.
Accessories
Once you have your vehicle set up, you’ll need to snag a few more items to finish the job!
Hitch Mount
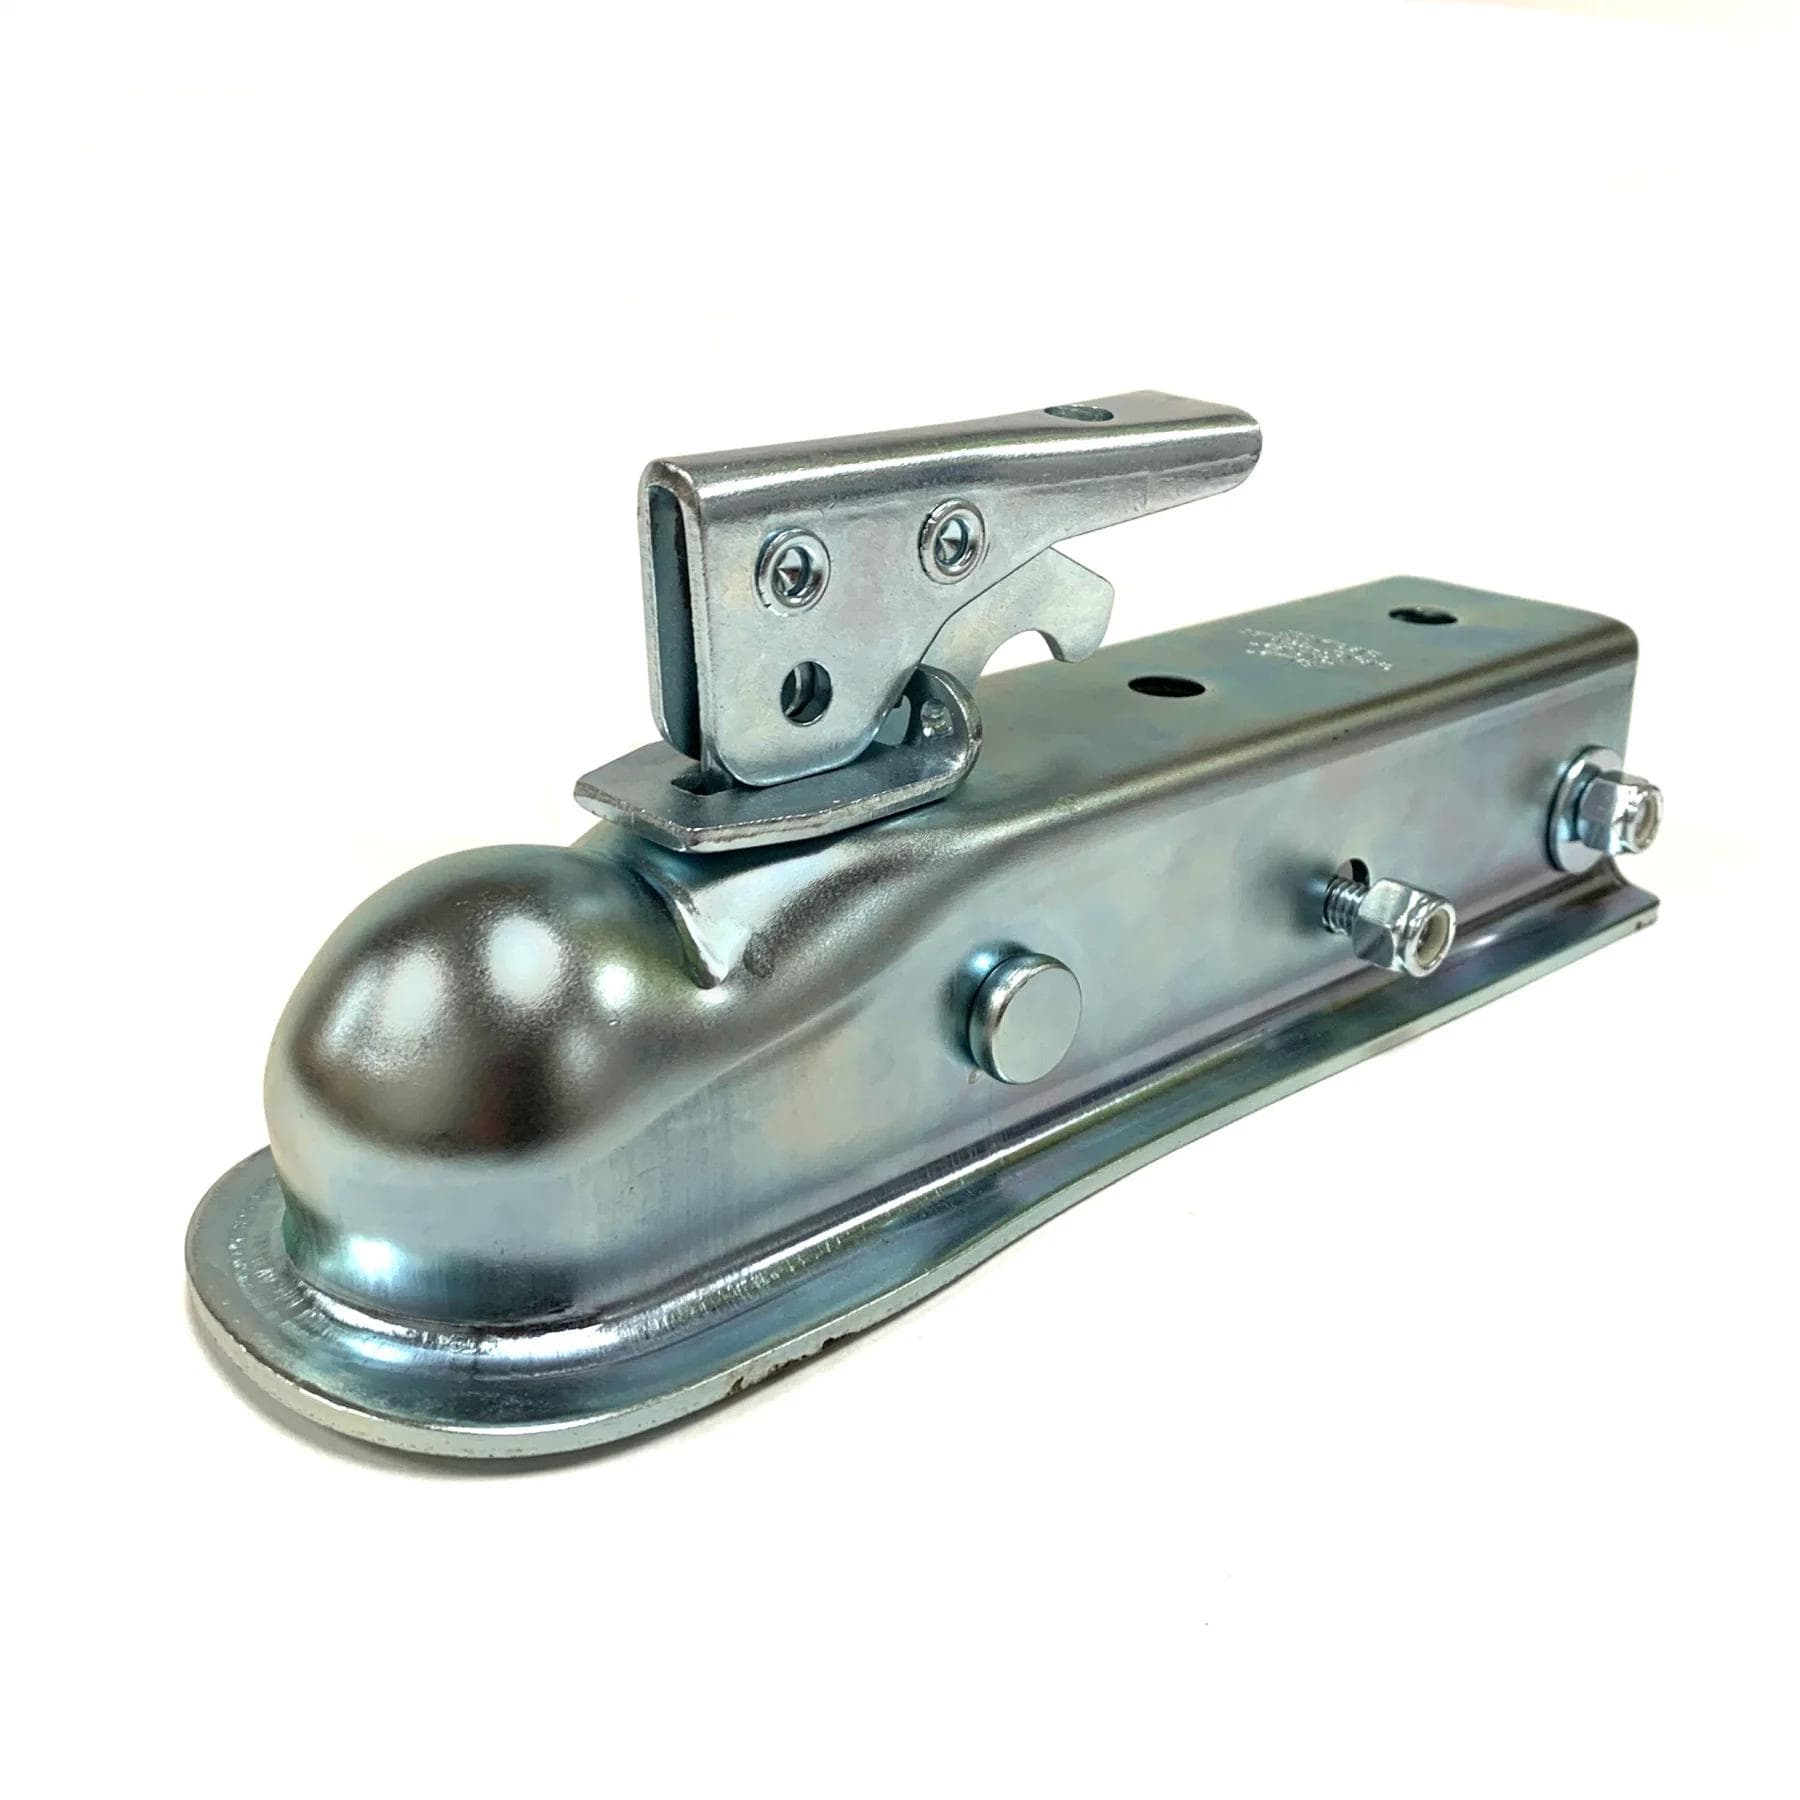
The next item you will need in order to tow any trailer is a hitch mount. A hitch mount is a receiver hitch accessory comprised of a shank and a trailer ball platform. The shank inserts into the hitch receiver tube. The platform provides a solid mounting point for a trailer ball (or a fully articulating coupler).

8-Position Adjustable Ball Mount

Trailer Hitch Ball Mount

6-Inch Drop Hitch Mount
It is important to have the mount at the proper height so your trailer remains level when towing. With your TOPO2, it comes standard with our Freeride Suspension System. This means the mount needs to be 26 inches from the ground
(If you have an Original TOPO with our standard torsion axle, the mount should be 24 inches from the ground.)
Hitch mounts come in a variety of fixed “drops” and “rises” as well as fully adjustable options, so you can dial the height in. Since the natural hitch height varies from vehicle to vehicle, you should take measurements to determine which you should buy.
The first step is to measure from the top of the hitch receiver tube, which is even with the top of the shank of the hitch mount, to the ground. You will take your desired height (24 inches for a standard axle (some Original TOPO owners), 26 inches if your build has the Freeride Suspension) and subtract the natural sitting height of the hitch. If you plan on using a 2" ball, you subtract an additional 2 inches. The resulting number is the amount of rise you have to account for.
Let’s use the following example:
We are setting up my tow vehicle to tow a pod with the Freeride Suspension. We need the hitch height to be 26 inches. The height of the hitch receiver as it naturally lies is 20 inches. So that means we need to make up the remaining 6 inches. We will select a hitch mount with a 6-inch rise.
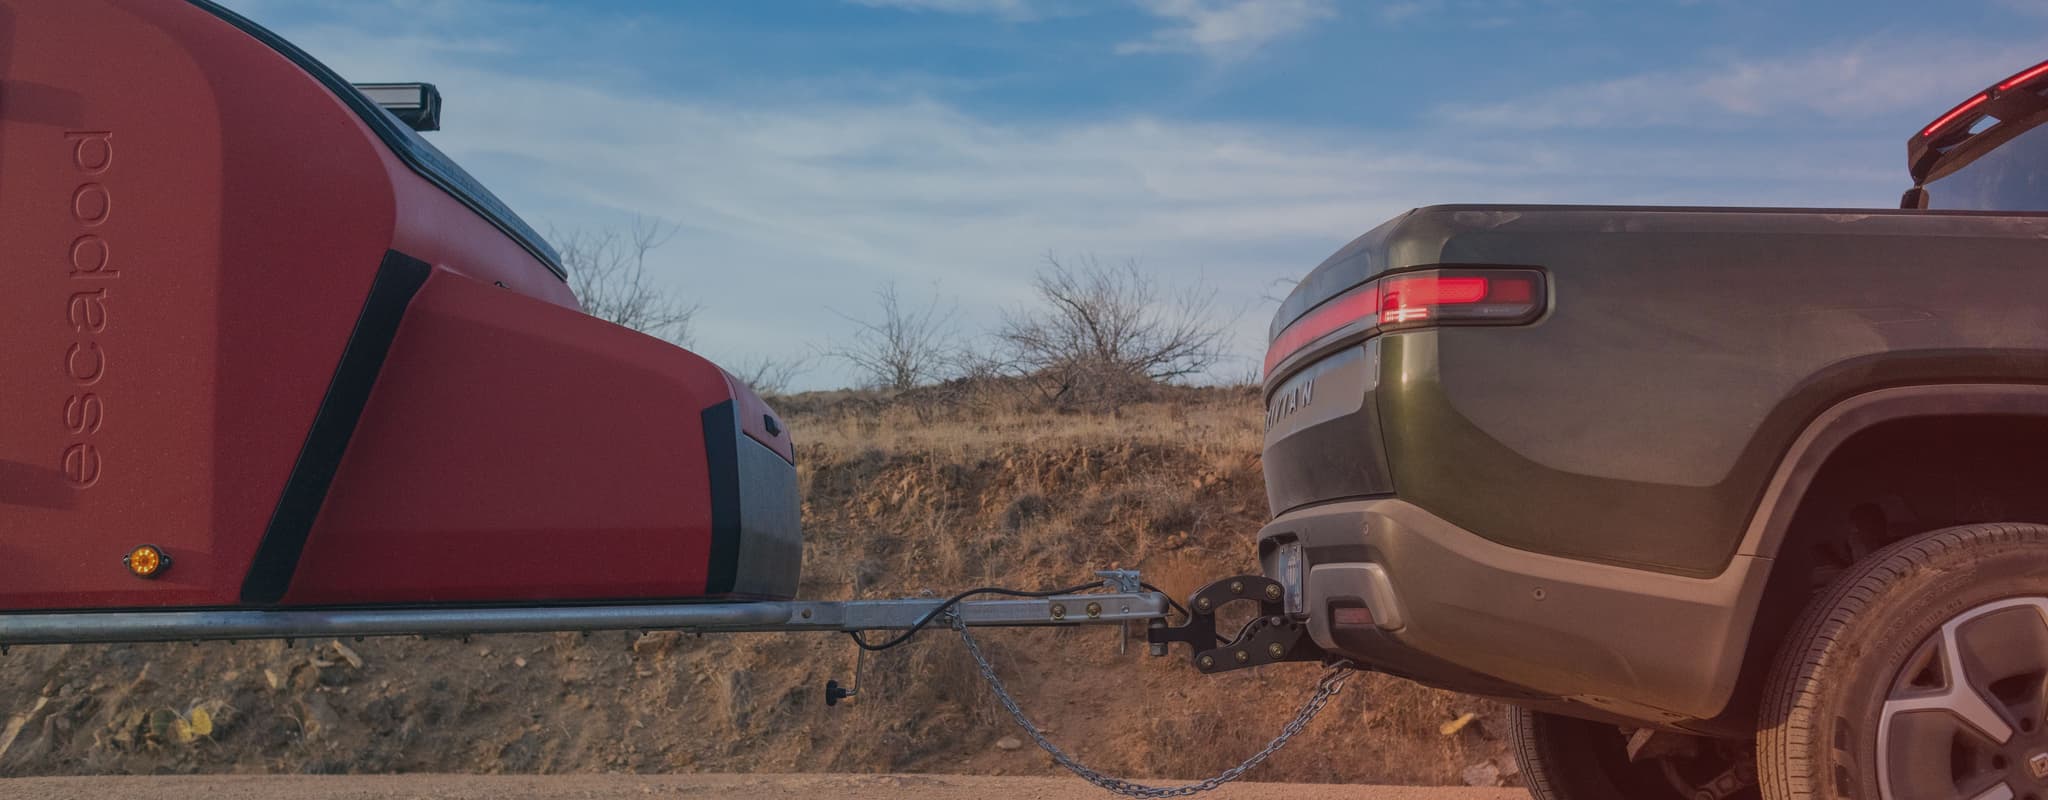
Couplers
We offer two different options for couplers. A coupler is the connection point mounted on the trailer which connects and secures the trailer to the vehicle. The first is a 2” ball coupler that comes standard with every Escapod trailer. If you have chosen this option, your hitch mount will need a 2” ball attached to it. You can purchase a 2” ball separately from the hitch mount, or you can purchase a hitch mount that comes with a 2” ball.

The second option is the Max Coupler, which is a fully articulating hitch. The benefit of upgrading to a Max Coupler is that it has a tri-axis, offset design that allows for unrestricted movement in three planes simultaneously without binding. In laymen’s terms, this means you’ll get a smoother ride. With this coupler, you do not need to purchase a 2” ball. You just need the hitch mount with a 1” hole to accommodate the articulating yoke assembly. When you come to pick up at the shop, we’ll install the articulating coupler on the trailer side receiver and install the yoke assembly in place of the 2” ball on your hitch mount.
Hitch Extension

If you drive a JEEP, Bronco, or another vehicle with a rear-mount spare tire, it may impede the trailer’s coupler from reaching your vehicle’s hitch mount. To be safe, you’ll want to purchase an extra long hitch mount that clears your spare tire or pickup a Class III-rated hitch extender.
For some of our top picks for trailer towing accessories, be sure to visit our Amazon Storefront. Check other ways to make your trailer ready for the road by visiting our post on how to make you pod your home-away-from-home!
If you have any additional questions, don't forget to check out our FAQ or feel free to reach out to [email protected]. We are happy to help answer any questions you may have so that you can get your vehicle ready for towing your pod!